Yamaha tiller replacement A zero play tiller extender for Yamaha outboards

Are you using a tiller extender on your Yamaha outboard? Then you probably share the frustration that the tiller extender introduces a lot of play in your steering system, feels insecure, and has multiple failure points.
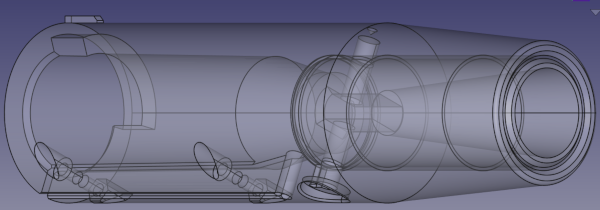
The main problem of course is that the original Yamaha tiller handle was never designed to accommodate a tiller extender. I therefor designed a new tiller handle that can accommodate a commonly available tiller extender.
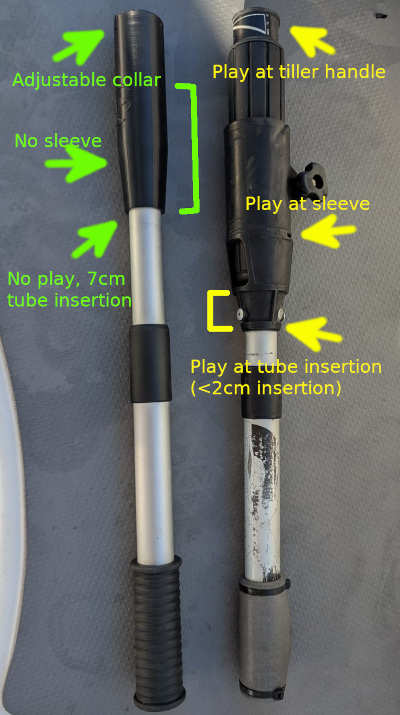
Zero play, more precise steering
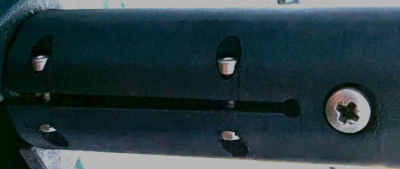
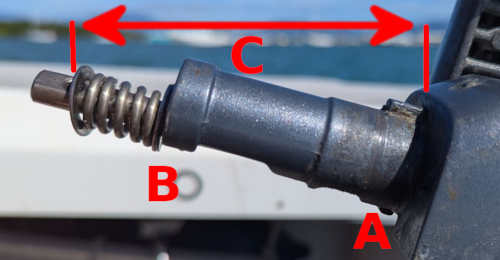
- The tiller handle fits like a glove on the bare tiller. To cope with wear, the clamping force is adjustable on the front and rear, so any developing play can be easily tuned out.
- The tiller extender tube inserts 7 centimeters into the tiller handle. In the original system, this was just a little over 1 centimeter.
- The flexible plastic sleeve with its bulky knob has been completely eliminated.
Safer
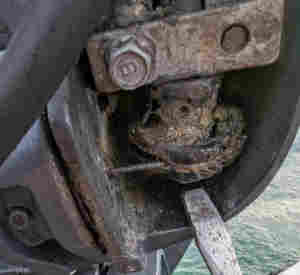
- The tiller extender tube is no longer connected by plastics only; the extender tube slides so deep inward that it overlaps the throttle axle. The screw to secure the tiller handle to the throttle axle therefore screws trough the aluminum tiller extender tube. Thus, even if all the plastics would break, the tiller extender will still be connected to the tiller axle.
- Less failure points. The sleeve around the tiller can no longer slip free, as the sleeve has been completely eliminated.
- Less metal fatigue as the sleeve around the extender tube is tapered and gradually transfers the lateral forces onto the extender tube.
- No more pop rivets that are supposed to secure the tiller extender into plastic material.
Sleeker and durable design
The whole contraption is less bulky and heavy. The tiller handle is made from ASA (acrylic styrene-acrylonitrile) which is highly UV and salt water resistant.
Wider extension range
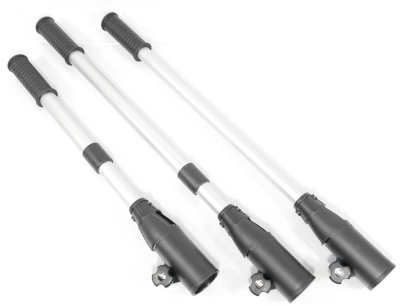
If you use a telescopic tiller extender: The shorter tiller handle and the eliminated clamp allow a shorter extension, while at the same time it can be extended further because the "double" tubing section is now longer.
No more damage and wear on the Yamaha tiller system and throttle axle
The original handle is no longer abused for the extension system and can be kept separately until the tiller extender is no longer needed. The throttle axle is no longer used as a pivot point, all lateral forces are only transferred to the tiller instead.
Compatibility
I designed this tiller handle for my F25 (25HP EFI 4-stroke) Yamaha, but it looks like many of the Yamaha outboards share the same tiller handle design.
I offer a 50% refund if you show me a picture of the tiller handle used on a model not yet listed on this page, and a picture of the engine ID plate.
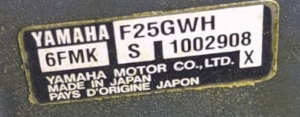
If your tiller is different than the one shown here, I can probably adapt the tiller handle to the dimensions of your tiller. Again I offer a 50% refund if you show me a picture of the installed tiller handle and a picture of the engine ID plate.
Ordering
Ordering information will be coming soon. The tiller handle will be 79 USD.
Installation
Installation is straightforward. First, it might be a good idea to take the original tiller handle off by taking out the screw on the underside of the tiller handle. You can then test fit the new handle, see step 9 how to do this.
- If your tiller extender is a telescopic model, go to the next step (2). If your tiller extender has a fixed length, just saw the tube to the desired length on the clamp side. Keep in mind that 7cm of the tube will be inserted into the new tiller handle. When finished, go to step 7.
- Remove the rubber grip of the tiller extender. Don't pull (this would make the diameter smaller and tighten the grip) but push it off.
- Take the new tiller handle as a reference and measure how much extension you *minimally* need.
- The outer tube of the tiller extender has a collar where the smaller diameter tube enters the bigger tube. In the minimal extension position, this collar will just be touching the new tiller handle. Cut the excess part of the outer tube at the grip end. Make sure to shift out the inner tube far enough so you only saw into the outer tube.
- Put the grip back onto the now shortened outer tube.
- With the tiller extender completely collapsed, cut the inner tube so that only 7 centimeters is still sticking out beyond the collar.
- Make sure to deburr the sawed end of the tube properly, otherwise you will have a hard time to push the tube into the tiller handle. Put some grease on the tube, then push it into the new tiller handle as far as possible. It helps if you rotate the tube back and forth while pushing it in. You should be able to see the tube appearing through the screw hole. The screw hole is elongated so you can verify that the tube is pushed in all the way.
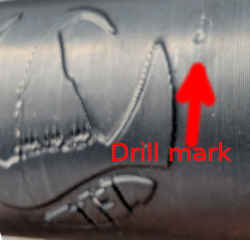
- You now need to drill through the inner tube so that the mounting screw can go all the way through.
Mark the exact center of the mounting hole, either with a pencil or with a small drill. If you are able to drill straight or have access to a drill press, you can take out the tube again and drill through both sides of the tube in one go.
If you however prefer to drill from both sides, there is a small dimple on the opposite side of the screw hole and you can drill through it with a small diameter drill to mark the tube on the other side. You can then take out the tube and drill through both sides separately.
When finished, push the tube in again, align the holes, and test fit the mounting screw. - Put some grease inside the tiller handle. Push it slowly onto the tiller. The small bar on the handle indicates the idle position and should be at the 12 o'clock position. You might need to support the throttle axle from underneath the tiller to get it centered. Also, the slot for the throttle is a tight fit, the throttle axle can be pushed inward, you can use a screwdriver at the end of the tiller to push it back out if this happens.
- Align the holes of the tiller handle, extender tube, and throttle axle. Insert the mounting screw and screw it until it can not go any further. Don't use excessive force. The supplied mounting screw is longer than the original screw because it also has to go through the extender tube.
- Use the adjustment allan screws to eliminate all play but don't make it so tight that the tiller handle becomes hard to turn.
- You can now admire the result.